
6 million dollar question: “If everything went down today, could you rebuild it from code?”
After this project, the answer is YES.
🎯 PROJECT 3 — GOALS
- By the end of this project, you will:
- Provision AWS infrastructure entirely from code
- Create and destroy EC2 safely using Terraform
- Manage Security Groups declaratively
- Understand Terraform state (very important)
Be able to say (confidently):
“I provision AWS infrastructure using Terraform.”
📦 WHAT WE WILL BUILD (CLEAR SCOPE)
Terraform will create:
✅ EC2 instance (Ubuntu)
✅ Security Group
- SSH (22)
- HTTP (80)
✅ Key Pair (or reference existing)
✅ Output values (public IP)
This will replace manual EC2 creation.
🗂 PROJECT STRUCTURE (PROFESSIONAL)
project-3-terraform-aws/
├── main.tf
├── variables.tf
├── outputs.tf
├── terraform.tfvars
└── README.md
NB: Note that we are using Bash terminal throughout the project except stated otherwise.
🧱 CLASS 1 — TERRAFORM SETUP & BASICS
Step 1: Install Terraform (Windows)
Download:
👉 https://developer.hashicorp.com/terraform/downloads
Choose:
- Windows AMD64
- Extract terraform.exe
- Add it to PATH
How do you add to path?
🧱 STEP 4 — ADD TERRAFORM TO PATH (CRITICAL)
This is the step most people miss.
3️⃣ Add C:\terraform to PATH (CRITICAL)
- Press Windows key
- Search: Environment Variables
- Open Edit the system environment variables
- Click Environment Variables
- Under System variables, select Path
- Click Edit
- Click New
Click on Browse.. and select the terraform folder we have save in C:.
Click OK on all windows.
⚠️ You must close and reopen Git Bash after this.

🧪 STEP 5 — VERIFY INSTALLATION
Close all terminals.
Open Git Bash again, then run:
Verify:
terraform -version
You must see a version number.
✅ STEP 2: Create the Terraform project directory
Now create it:
mkdir project-3-terraform-aws
Enter it:
cd project-3-terraform-aws
Confirm:
pwd
You should see:
.../Desktop/project-3-terraform-aws
✅ Now you’re in the right place.
☁️ AWS SETUP — KEY PAIR (SAFE & CORRECT)
🎯 What we are doing
By the end of this, you will have:
- An AWS account
- An EC2 Key Pair
- A .pem file saved safely
- The key pair NAME ready for Terraform ⚠️ We are NOT creating EC2 yet — just preparing access.
STEP 1: Log in to AWS Console
Go to:
👉 https://console.aws.amazon.com/
Sign in with your *AWS account.
*
STEP 2: Select the correct region (IMPORTANT)
Top-right corner of AWS Console:
Select US East (N. Virginia) → us-east-1
Why?
- Free-tier friendly
- Matches our Terraform default
- Most tutorials & AMIs work here
STEP 3: Go to EC2 Dashboard
In the AWS search bar, type:
EC2
Click EC2.
STEP 4: Create a Key Pair
In the left sidebar:
Network & Security → Key Pairs
Click Create key pair.
Fill the form:
Name:
terraform-key
(simple, professional, reusable)
Key pair type: RSA
Private key file format: .pem
Click Create key pair.
STEP 5: SAVE THE KEY FILE (VERY IMPORTANT)
Your browser will download:
terraform-key.pem
Do NOT delete it
Do NOT rename it
⚠️ AWS will never show this file again.
✅ STEP 3: Initialize the project files
Create the Terraform files we’ll use:
`touch main.tf variables.tf outputs.tf terraform.tfvars`
Confirm:
ls
You should see:
main.tf variables.tf outputs.tf terraform.tfvars
Now that the folder exists and files are created, open it in VS Code:
code .
Step 1: Paste variables.tf
Open variables.tf and paste:
variable "region" {
description = "AWS region"
type = string
default = "us-east-1"
}
variable "instance_type" {
description = "EC2 instance type (keep low-cost)"
type = string
default = "t2.micro"
}
variable "key_name" {
description = "Existing AWS key pair name (NOT the .pem filename)"
type = string
}
Step 2: Paste `main.tf`

Open `main.tf `and paste:
terraform {
required_providers {
aws = {
source = "hashicorp/aws"
version = "~> 5.0"
}
}
}
provider "aws" {
region = var.region
}
resource "aws_security_group" "web_sg" {
name = "terraform-web-sg"
description = "Allow SSH and HTTP"
ingress {
description = "SSH"
from_port = 22
to_port = 22
protocol = "tcp"
cidr_blocks = ["0.0.0.0/0"]
}
ingress {
description = "HTTP"
from_port = 80
to_port = 80
protocol = "tcp"
cidr_blocks = ["0.0.0.0/0"]
}
egress {
from_port = 0
to_port = 0
protocol = "-1"
cidr_blocks = ["0.0.0.0/0"]
}
}
data "aws_ami" "ubuntu" {
most_recent = true
filter {
name = "name"
values = ["ubuntu/images/hvm-ssd/ubuntu-jammy-22.04-amd64-server-*"]
}
filter {
name = "virtualization-type"
values = ["hvm"]
}
owners = ["099720109477"] # Canonical (Ubuntu)
}
resource "aws_instance" "web" {
ami = data.aws_ami.ubuntu.id
instance_type = var.instance_type
key_name = var.key_name
vpc_security_group_ids = [aws_security_group.web_sg.id]
tags = {
Name = "terraform-web-instance"
}
}
Step 3: Paste `outputs.tf`

Open `outputs.tf` and paste:
output "public_ip" {
description = "Public IP of the EC2 instance"
value = aws_instance.web.public_ip
}
Step 4: Set `terraform.tfvars`

Open `terraform.tfvars` and paste (edit the key name):
key_name = "YOUR_KEYPAIR_NAME"
⚠️ This must be your AWS Key Pair name (example: nodejs-key) — not nodejs-key.pem.

Step 5: Run Terraform commands (from Git Bash in project-3 folder)
terraform init
terraform fmt
terraform validate
terraform plan
STEP 6: Confirm the **Key Pair** exists

Back in `AWS Console → Key Pairs`

You should see:
terraform-key
👉 Terraform uses the **name**
👉 SSH uses the **.pem file**

STEP 7: Prepare for **Terraform**

Now go back to your local machine.

Open:

`project-3-terraform-aws/terraform.tfvars`


Set:
key_name = "terraform-key"
✅ This is correct.

🚀 PROJECT 3 — CLASS 2 (CONTINUED)
Terraform Plan → Apply → Verify → Destroy (Cost-Safe)

You already have:

✅ Terraform installed

✅ AWS CLI configured

✅ Key pair created: terraform-key

✅ Terraform files created

Now we proceed.

✅ **Step 1: Set the key pair in Terraform**

Open `terraform.tfvars` and confirm it contains exactly:

`key_name = "terraform-key"`

Save the file.

✅ FIX AWS CLI v2 (Windows 11)

Step 1: Check if AWS CLI files actually exist

Open File Explorer and go to:
C:\Program Files\Amazon\AWSCLIV2\
Look for:
aws.exe
Also check this folder:
C:\Program Files\Amazon\AWSCLIV2\bin\
Look for:
aws.exe
How to add PATH:

Press **Win key** → type **Environment Variables**

Open **Edit the system environment variables**

Click **Environment Variables…**

Under User variables (top), select **Path** → **Edit**

New → paste the path above

**OK → OK → OK**

✅ Now close ALL terminals (PowerShell + Git Bash) and reopen PowerShell.

Test:

**where aws
aws --version**

**After AWS works: configure creds for Terraform**

Once `aws --version` works, do:
aws configure
Set:

region: `us-east-1
`
output: `json`

Then confirm:
aws sts get-caller-identity
Then go back to your **Terraform folder** and **run**:
terraform plan
Expected output (example):
C:\Program Files\Amazon\AWSCLIV2\aws.exe
aws-cli/2.xx.x Python/3.xx Windows/10 exe/AMD64
✅ **Then continue Project 3 (Terraform AWS)**
Configure AWS credentials:
aws configure
Enter:

**Access Key ID** → from AWS IAM
**Secret Access Key** → from AWS IAM
**Region** → `us-east-1`
**Output** → `json`

Verify:
aws sts get-caller-identity
Then:
Copy code
terraform init
terraform plan
You should get a successful result.
**Next step (Project 3)**
From the same folder `(~/OneDrive/Desktop/project-3-terraform-aws)` run:
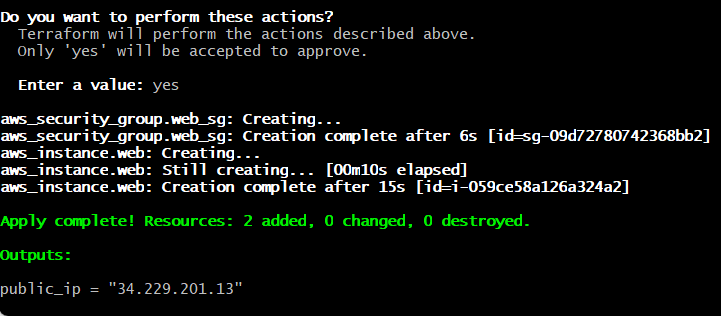
terraform apply
Type **yes **when it asks.

After it finishes, **run**:
terraform output
You should see the
public_ip
**1) Get the EC2 Public IP**
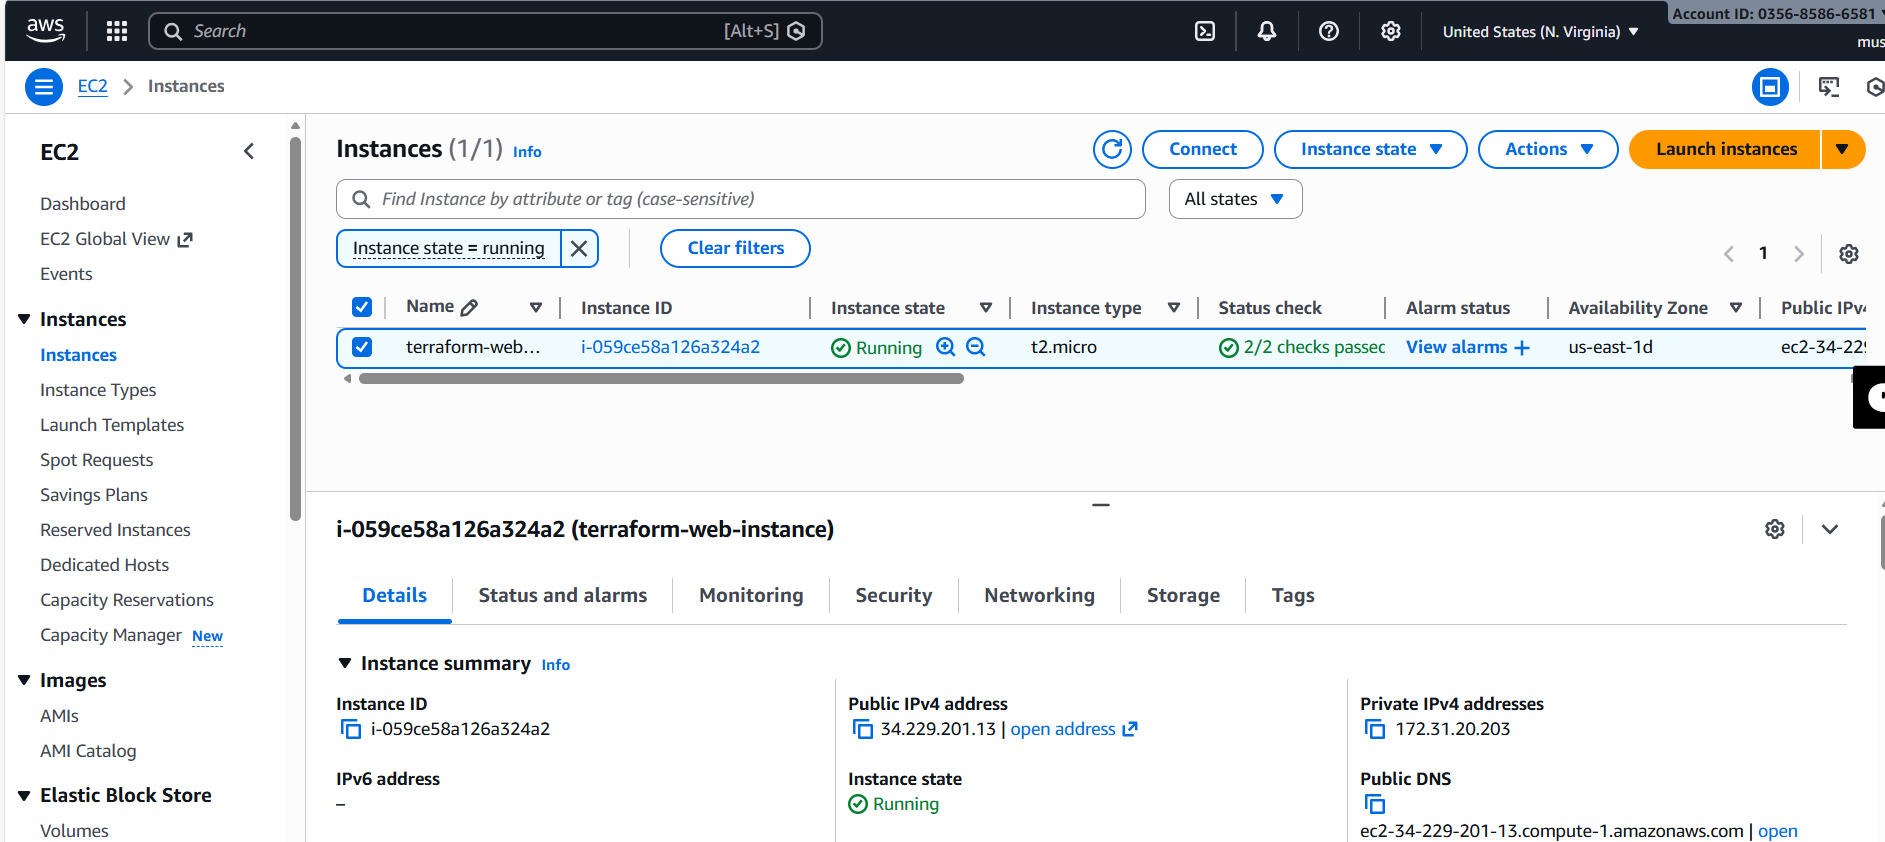
Run (in the same project folder):
terraform output public_ip
If it says “no outputs found”, run:
terraform refresh
terraform output
(That will display it.)

Then we test it

1) SSH into the server (Git Bash)

Your keypair name is terraform-key, so your file is likely on Desktop.

Run:
chmod 400 ~/OneDrive/Desktop/terraform-key.pem
ssh -i ~/OneDrive/Desktop/terraform-key.pem ubuntu@34.229.201.13
If your key is in **Downloads** instead:
chmod 400 ~/Downloads/terraform-key.pem
ssh -i ~/Downloads/terraform-key.pem ubuntu@34.229.201.13
2) Once you’re inside EC2: install Docker and run the proof app

Paste these **exactly**:
sudo apt-get update -y
sudo apt-get install -y docker.io
sudo systemctl enable --now docker
sudo usermod -aG docker ubuntu
newgrp docker
docker run -d --name hello -p 80:80 nginx:alpine
Now open in your browser:
http://34.229.201.13
You should see the Nginx page ✅

**Destroy everything (from your Terraform folder)**
Make sure you’re in the **right folder**:
cd ~/OneDrive/Desktop/project-3-terraform-aws
Run:

`terraform destroy`

Type:` yes`


This will remove:

- EC2 instance
- Security Group

2) Confirm it’s gone

After it completes, run:

`terraform output`


It should either show nothing useful or error because resources are gone.

Top comments (0)